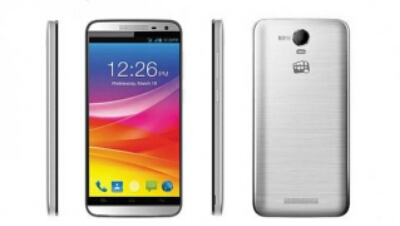
How to root tecno L3

Brief review of Tecno L3, it Comes With 3.0MP back camera with LED flash, and 0.3MP front VGA camera optimized for self-
portrait photos & video calls (Skype, Viber, & WeChat compatible). Tecno L3 has 4GB plus free 8GB memory card and it can carry up to 32GB memory card runs on Android 4.1.1 (Jelly Bean).
See also: TECNO L3 full spec and features
How to root tecno L3
To root our Tecno L3, the first thing to do is update the drivers of the Computer or Laptop you are
using.
Download MT6577 USB VCOM Driver (W7/Vista/XP) by visiting this Link:
MT6577 USB DRIVERS
After downloading, unzip the file using: 1. WinZip for PC
2. WinZip for Mac, or any software.
Now follow the steps below:
1. Open Device Manager in Windows. [Right Click on My Computer icon on Desktop then click on Manage after it click on Device Manager]
2. Now TURN OFF your phone !!!. (I mean turn it OFF) and Plug into Computer via USB cable. You will see MT65xx Preloader in Device Manager.
Note : If you are not seeing this try removing battery from mobile and plug into computer without battery.
3. Now double click on Installdriver.exe to run it (the file is in the folder you just unzipped, a popup appears asking whether to install unsigned drivers or
block, click on install it anyway. After it a confirmation dialog box will appear telling you Successfully installed usb drivers.
Note: This will only appear in Windows 7 and later versions.
4. Restart your Computer or Laptop.
5. After rebooting, “Open device manager” again and DON’T TURN ON your Phone !!!. Plug it into same USB port. Now MediaTek PreLoader USB VCOM port will appear in device manager. (If you are not fast you
will not even see it because it will appear and disappear quickly)
6. Now right click on it (MediaTek PreLoader USB VCOM) and click on Properties then select DRIVER TAB, then click on UPDATE DRIVER. Click on Browse my computer for driver software.
7. Now navigate to download folder and select Win7 folder. That is all. You can now go ahead with the steps for the rooting of L3.
ROOTING OF L3
Download the Files to be used for Rooting here
a. http://www1.datafilehost.com/d/6d74e15a
b. http://www1.datafilehost.com/d/5de778b0
I advise you to open a new folder and put these two files you are about to download because when you
unzip them, they will be plenty and you will take a long time searching for them.
Please install ROOT CHECKER from googleplay store so that at a point in the process, I will tell you to check whether you have root access.
Installation of Files
* Click on the extracted folder labelled
SP_Flash_Tool_v3.1224.01 you will see the SPFlashtool with this icon below, click on it.
* When the box opens, click on SCATTER-LOADING. It is at the far right hand side of the box. See pic below
* A box will pop up. Check the files you extracted and click on MT6575_Android_scatter_emmc.txt
when you do it you will see the pic below
* Scroll down the list of items you see there and tick
the small box in front of BOOTIMG .
* Click on the name BOOTIMG, a box will come up. Go to your extracted files and click on
L3_130613__boot_patched_130804-160810.img
click on Open.
* Scroll down the list again and click RECOVERY (it is directly below BOOTIMG) Go to your extracted files
and click on
L3_130613__recovery_130804-160810.img click on Open
* After you have loaded both files, Click on DOWNLOAD. If you check the top right corner, you will see 2 types of DOWNLOAD. Click the second one NOT the first one. See pic below
* Now connect your Tecno L3 via USB with the battery inserted in the phone BUT SWITCHED OFF. I mean the phone should be switched OFF and connected to the computer.
* A red process bar will come up, just allow the process to continue, when the process is complete you will see a green circle pop up. See pic below
* You can now unplug your phone from the Computer and SWITCH IT ON. I mean put your phone ON.
* When you switch ON the phone, YOU have to enable USB DEBUGGING.
==>Go to SETTINGS, Scroll down to DEVELOPER OPTIONS and click on it.
==>at the top you will see ON/OFF , slide the bar to ON
==>Scroll down and tick the USB DEBUGGING box, it
will ask you CANCEL/OK, choose OK.
* Connect the phone to the computer via USB.
* One of the files you downloaded and extracted is MtkDroidTools_v248. Click on it, then click on MtkDroidTools.
There is a green coloured app called MTKdroidTools, click on it. It will bring up a box where you will see two headings, click on ROOT, BACK UP, RECOVERY. See Pic below
The application will now detect your phone information (Remember your phone is ON now)
* Click on SUPER USER, it will bring up two files. Click on the Second one which is “SuperSU” and it will install. You will see complete in the box by your right hand side.
* Click on ROOT CHECKER app in your phone, then click on Verify root access.
CONGRATULATION Your phone is ROOTED!!!
Remove your battery and put it back, then ON the phone, you will see Super User, Root Explorer in your phone Menu.


If you don’t understand the process above, don’t even try doing it so that you won’t end up spoiling your phone. s